The MindShift Horizon 34 L
Posted by Unknown on Monday, July 20, 2015 with No comments

Introduction: Determining a Need
For years I have eschewed the idea of a divided camera-specific bag and instead used a PPPP solution: Padded Pouches Plus Pack. With this solution, I place individual padded pouches containing camera bodies, lenses, and flashes into a bag or pack of my choosing. This gave me the ultimate in flexibility. If I only needed a body and two lenses (Local Mode PPPP), then a messenger bag and insert would do.


Using a pack that was primarily designed for hiking instead of transporting photo equipment meant that the pack had a legitimate suspension system that would allow me to comfortably carry a heavy load for a long time. This option was more flexible and better suited to my needs than any dedicated photo pack I had come across. I trekked the world with this solution.
Problem solved; no need to keep looking for the perfect camera bag, right?
Not quite. While I am still a firm believer that varying needs makes it fruitless to search for the one perfect bag and my Travel Mode PPPP solution does work pretty well, it does have its limitations:
1. Terrible organization. With a lot of pouches, finding a particular piece of equipment does mean digging through to find the pouch that inevitably is at the bottom of the pack.
2. Bad access: If your daypack is a top loader, you need to dig past your jacket, lunch, and the new T-shirt you just bought at the gift shop in order to access your equipment.
3. Exposure: If your daypack is a panel loader, you have to take off your pack, lay it down on the ground, and entirely unzip the front panel. This means your equipment is exposed to rain, bird poop, and the risk of falling out.
4. Not bothering. This is perhaps the biggest issue. As a result of the headaches listed above, on many occasions I have decided to forgo taking a photo simply because it is too much of a hassle to deal with taking out my gear. I know this makes me sound like an uncommitted photographer, but I would bet all of you have done this at some point in your shooting careers when the family wants to keep moving instead of waiting ten minutes for you to get a shot that you are only marginally excited about.
So where does this leave me? Well, it turns out that I do think I have found a perfect Travel Mode camera bag. To be clear, I am not talking about the perfect camera bag for all occasions. I am talking about a bag that is perfect for walking through a city or hiking in a national park. This includes the ability to:
- Carry one body, three lenses (one attached to the body), a flash, extra batteries, and a small tripod,
- Hold travel-related needs (lunch, phone, rain jacket, travel documents, water bottle),
- Safely hold an iPad or small notebook,
- Comfortably carrying a 20 pound load all day,
- Fits in an overhead compartment, and most critically...
- Avoid each of the four accessibilty issues listed above.
There really is only one bag that covers all of these needs at the moment: The Mindshift Rotation 180 Horizon 34L. It is important to note that this is a technical pack that would NOT be appropriate for Local Mode. It is too bulky and will have people asking you where your hiking boots are if you were to stroll into your office sporting this pack. It does come in two colors: Charcoal and Tahoe Blue. I reviewed the charcoal version but here is a photo of the blue version:
As per usual, I will first cover "The Good Stuff," then "The Stuff That I Could Take or Leave," and finally, "The Not So Good Stuff."
The Good Stuff:
1. The stow-able belt pack. This thing is really a fanny pack, but given the negative connotations associated with fanny packs I can understand why Mindshift chooses to call it a "belt pack." You will note in the photo below that this belt pack is stowed in a tunnel-like section along the bottom of the pack (just behind a spring-loaded flap). When wearing the pack, this belt pack can swing out of its tunnel around to your front to give you access to your camera equipment without having to remove the pack. The belt pack has padded dividers that you can arrange to suit your needs. This whole feature works incredibly well and is clearly the thing that separates this bag from any other photo bag I have seen (other than the other four Mindshift 180 bags, of course). One more thing. The belt pack can be used separately from the rest of the pack as a...fanny pack.


2. The belt pack lid. The lid on the belt pack opens away from your body when you are accessing your camera. This means that it can swing out and away allowing you complete access to your gear. There are many bag manufacturers that forget this small yet important detail.


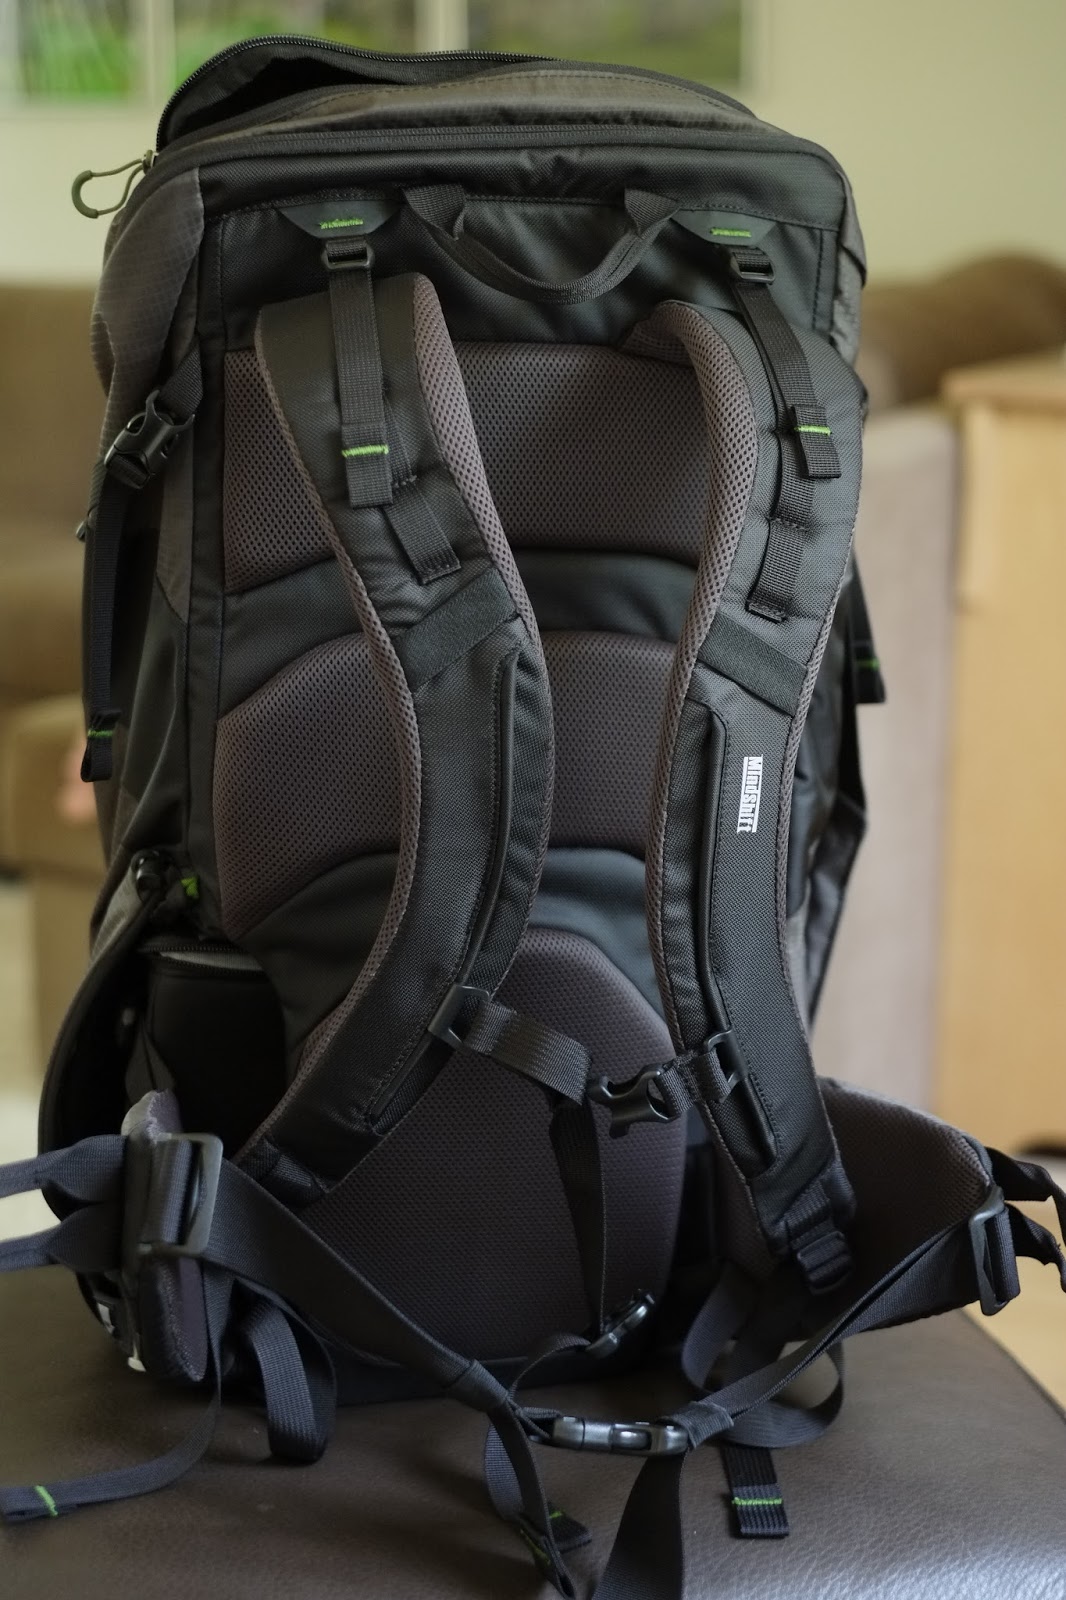
3. The suspension system. The shoulder straps, the hip belt (and it is truly a padded hip belt - not a skimpy webbing waist belt), and the internal frame (a single stay and sheet) match the quality and design seen on technical backpacks. Clearly this was designed for true wilderness use where one would expect to be hiking on the order of miles rather than feet. Though I have yet to test it for this kind of distance, I am an avid backpacker (ok, maybe I was in my youth) and I know that it will be comfortable for long-distance hiking. Certainly, the suspension system will be up for a day hike up Mt. Washington or touring the neighborhoods of Paris.

4. The garage door. The flap that keeps the fanny pack in place when it is stowed is well-engineered and works flawlessly. It has a magnetic clasp that is within easy reach of your right hand. When you slide this clasp downward, the door swings up and away allowing you to grab the side handle of the fanny pack and pull to around to your front. To reconnect the garage door once the fanny pack is back in its cave, you simply need to bring this clasp close to its complementary piece and it will magnetically reconnect with a snap. It truly is an elegant design.

5. Hydration options. The left side of the pack contains a vertical pocket that is dedicated to fit a water bladder. Water bladders are far superior to water bottles in term so water access (no need to reach for water) and bulkiness. There is a velcro loop at the top of the pocket that allows the bladder to hang properly and there is a tunnel through which you can feed the water tube.


6. Storage options. Beyond the fanny pack that one will use for camera equipment, there are other voluminous pockets and compartments on the pack that allow you to carry other essentials such as snacks, a raincoat, the pack's rainfly, etc. It is incredibly versatile bag with five different pockets/compartment as shown below.


7. Lash points. There are lash points on the shoulder straps and on the front panel for accessories or attaching gear and tools. There is a single ice-axe loop, two side load compression straps, and a handle loop on the back if you need to lower this bag via climbing rope to your belayer. Once again these important details that are not often seen on photo backpacks reflects the technical backpacking genes of this bag.

8. Stands on its own. Too many backpacks cannot sit upright without flopping over one way or the other. In this case, the Horizon 34 L does. Again, this is a small yet very important detail that you notice when it is a feature missing from other packs. In other words, you don't know how much you need it until the bag you bought lacks it.

9. Zipper loops. All the zipper pulls have large cord pulls with plastic covers that keep them wide open. This design allows you to open and close the zippers with gloves on and simply gives you more pulling leverage. The lack of metal pulls means no jingling when moving around.

10. Tripod options. There are three ways in which you can carry your tripod on this pack. With a compact tripod, you can stash it alongside the pack with the tripod legs in the pocket and the compression strap holding the head of the tripod in place. This would work particularly well if balanced with the weight of a water bladder on the opposite side.

If you have a larger tripod, it can be affixed along the central, dorsal side of the pack with the hidden tripod holding straps and pockets. I am not a huge fan of this option because it tends to put a significant mass too far away from your back making the load feel heavier than it should.

The third option require that you purchase a tripod suspension kit that allows the tripod to be affixed in such a way as to make it immediately accessible.

I am not convinced that this is necessarily. In my mind, it is okay for me to have to take off my pack in order to remove my tripod. After all, if you are about to use a tripod then it is likely that you will be slowing down to make a more deliberate shot anyway.
11. Well made. With the parent company being ThinkTank, I am not at all surprised that this bag is made to really high standards. It will last and if it doesn't, they have a lifetime warranty.
The Stuff That I Could Take or Leave:
Nothing of note. There is not a single excessive feature on this bag that I could not imagine using at some point. That is saying something.
The Not So Good Stuff:
1. Separate rain cover. The fact that there is a rain cover is a good thing. I just wish that is was an integrated rain cover and unfolded out of its own pocket from the bottom of the bag. That way I would not forget to bring it with me or have to recall where in the bag I placed the rain cover. Not a deal breaker by any means, but certainly something that I am a bit surprised that Mindshift did not add.
2. Belt pack size. The belt pack is necessarily small. If it did not have the swing to the front feature, one could imagine that the size of the compartment and therefore the amount of camera equipment one could pack into the belt pack could increase significantly. Of course, there is a trade off here and one could always purchase the larger Mindshift bag. Just know that there is no free lunch when it comes the oh-so-cool 180 degree feature.
3. Organizer panel. As regular readers of my blog know, I am a huge fan of accessible organizer panels. Of course this is far more critical when looking for a crossover commuter bag as you need to always get access to business related items such as your cell phone, pens or styli, and er...chapstick. Having all this stuff in its own slot makes for a much more useable bag. For a backpack that you will be using on your off days, one could argue that this is wholly unnecessary. However, I think that it is certainly desirable. After all, it cannot be argued that it is easier to find an item when it is stored in its specified slot as opposed to being jumbled together in the bottom of a pocket. You will see in the video what I have done to ameliorate this problem.
4. Padded laptop section. Now even I have to admit that this might be a bit silly of me to point this out as a flaw. There is a mesh pocket that Mindshift even suggests that one could use as a laptop pocket in the main compartment of the bag. However, if you have hard stuff in this main comparment bag like backpacking stove, climbing protection, or couple of cans of Guinness, having a padded pocket would protect the laptop or iPad better, right? Am I just being crazy? Perhaps.
5. Dedicated goggle/sunglasses pocket. Of course, if you are using this bag outside, then you are wearing your shade on your face. However, if I am traveling in a city where I might be going into cathedrals or museums, then having a fleece lined zippered pocket to for my sunglasses would be really handy. Okay, I get it. I can just stick them in my shirt collar or slide the onto the top of my head. Unfortunately, I wear prescription glasses, so this isn't really an option as I need to switch out my glasses. I suppose Lasik is the next step.
6. Shape of belt pack. This is really not a big deal, but it is worth mentioning. The belt pack is not symmetrical. It can't be if you want it to slide in and out of its garage easily. It tapers from a wider section to a narrower section. This means that what you put on the wider side of the compartment will not necessarily fit on the narrower side. You need to make sure you think about this a bit as you might be in a situation where you have mounted to your smallest lens and need to be creative about where to place your two larger lenses. Again, there is not free lunch.
Summary
As I said at the outset, this is the pack that seems to have ended my search for the Holy Grail of travel packs. It cannot replace my everyday commuter bag (in which I always have my camera) or my lightweight option (a Tenba messenger-style bag), but it perfectly complements these two bags. I know have three bags that allow me to comfortably have my camera with me at all times. Indeed, I will use the Horizon 34 L less often than my other two bags, but when I do use it, I will certainly enjoy the experience.
Equipment considerations
I used to be a Canon 1D series user with a set of fast prime lenses. Six years ago, I found that the weight and size advantage of a mirrorless system far outstrips the advantage of a larger sensor. This is particularly the case with Fujifilm who makes sensors lacking Bayer filters and lenses of sufficient quality and speed as to largely eliminate the large sensor advantages. As a result, I have no problem fitting a complete travel kit in the Mindshift Horizon 34L. Know that if you had a professional body (built in vertical grip) it would NOT fit in the belt pack of the Horizon. You also could not fit a Canon 5D series body or its Nikon equivalent with a 70-200 f/2.8 lens attached.
This is what I put in the Horizon's belt pack when hiking/touring:
Fujifilm X-E1 with 35mm f/1.4 attached
56mm f/1.2
14mm f/2.8
iPhone
Wallet
In other places in the pack I also have the following camera-related gear:
Two backup camera batteries
Two AAA backup batteries for the flash
The Fujifilm EF-X20 flash with off camera shoe cord
iPad mini with SD card reader
Categories: Camera Bag Review


0 comments:
Post a Comment